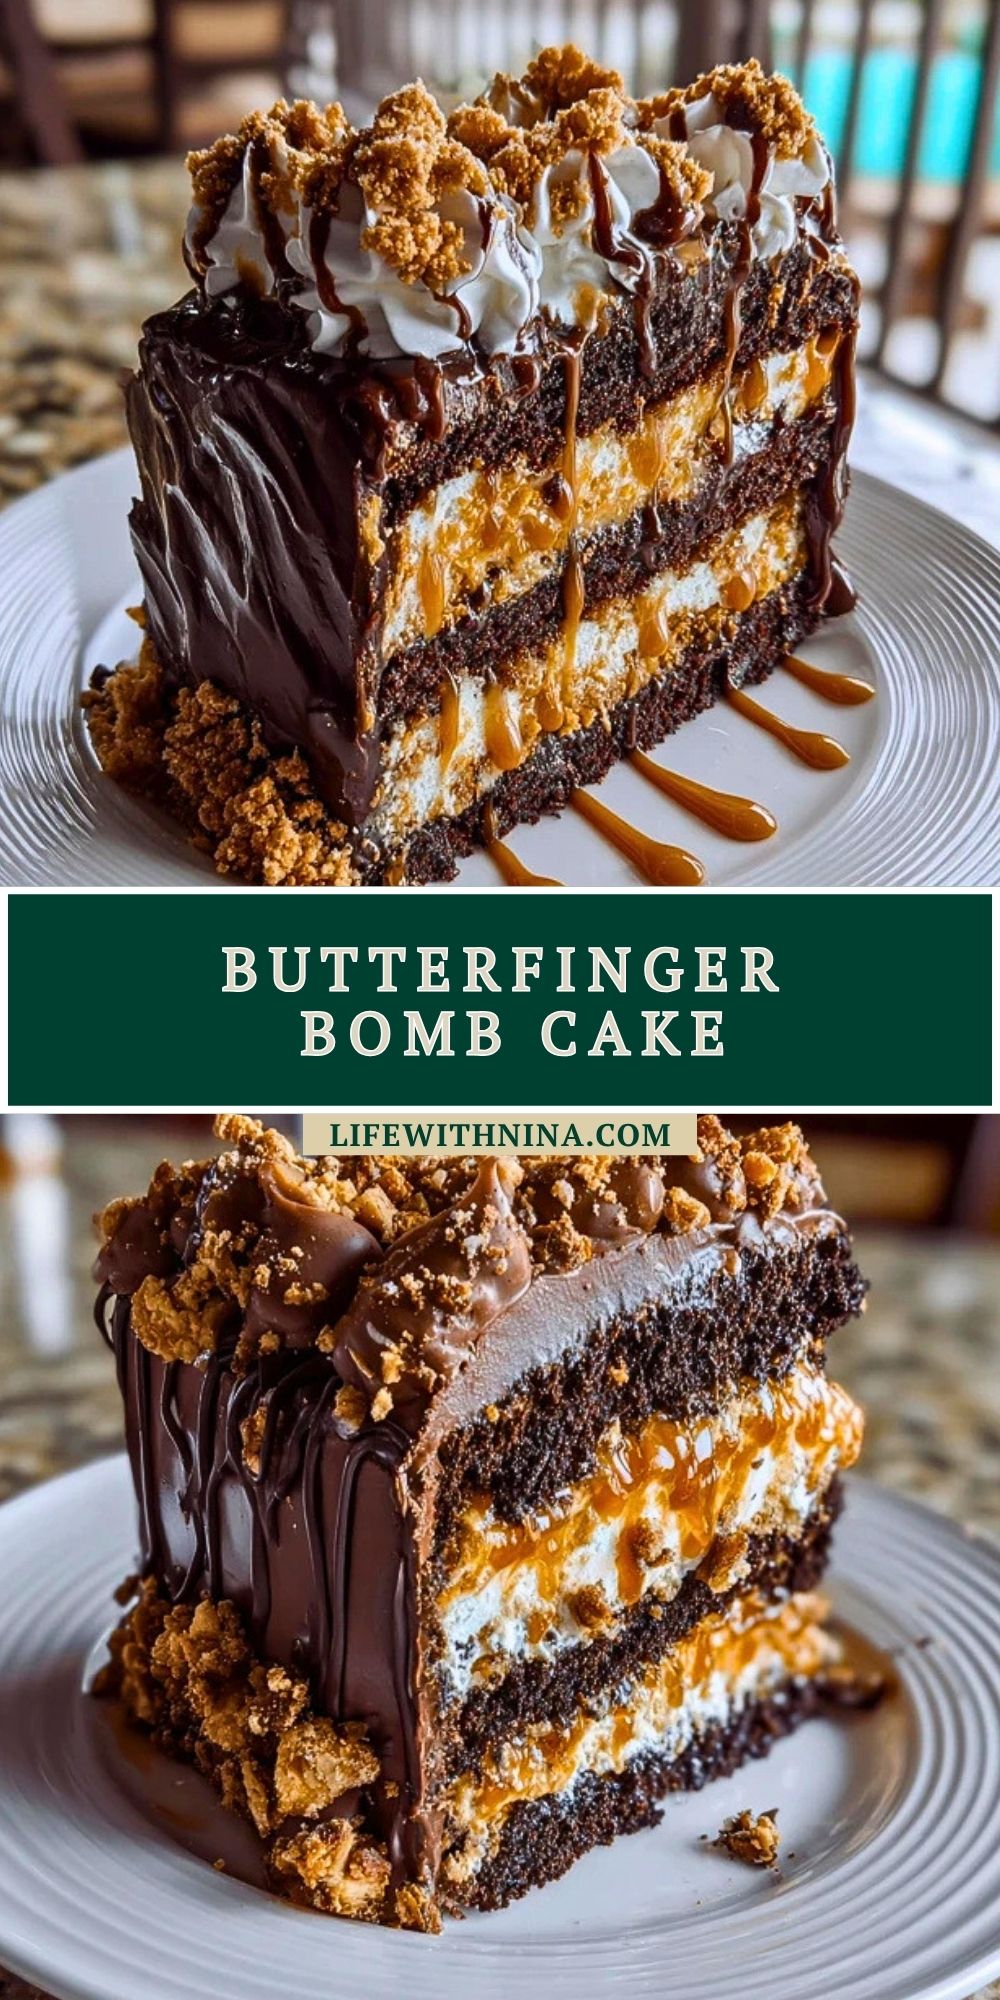

Butterfinger Bomb Cake is the kind of dessert that instantly steals the spotlight. With rich chocolate cake, a creamy peanut butter filling, plenty of crushed Butterfinger candy, and a glossy chocolate topping, every slice is packed with bold flavor and irresistible texture.
This is the perfect cake for birthdays, potlucks, holidays, or any day when you want a dessert that feels extra special without being overly complicated. It looks impressive on the table, but the layers come together in a way that is simple and rewarding for home bakers.
What Makes Butterfinger Bomb Cake So Irresistible?
What makes Butterfinger Bomb Cake stand out is the mix of creamy, crunchy, chocolatey, and peanut buttery layers in every bite. The chocolate cake gives it a soft and rich base, while the filling adds a fluffy, sweet contrast that balances the candy crunch beautifully. On top of that, the chocolate drizzle brings everything together with a smooth finish that feels bakery-worthy.
It is also a great make-ahead dessert because the flavors settle and become even better after chilling. That means you can prepare it in advance and serve it when you are ready, which makes it especially helpful for parties and family gatherings.


Ingredients for the Butterfinger Bomb Cake
Each ingredient in Butterfinger Bomb Cake helps create the rich layers, creamy texture, and candy-packed finish that make this dessert so memorable.
Chocolate cake mix
This gives the cake its soft, rich chocolate base and keeps the recipe simple and dependable.
Eggs
Eggs help bind the batter and support the structure of the cake so it bakes up tender and sturdy enough for layering.
Vegetable oil
Oil adds moisture and helps the cake stay soft even after chilling.
Water
Water loosens the batter and helps the cake bake evenly.
Cream cheese
Cream cheese is the heart of the filling, adding tanginess and richness that balances the sweetness.
Powdered sugar
This sweetens the filling while keeping it smooth and fluffy.
Creamy peanut butter
Peanut butter gives the filling its nutty flavor and creates that classic candy bar taste.
Whipped topping
Whipped topping lightens the filling so it feels airy instead of heavy.
Butterfinger candy bars
These bring the signature crunch and caramelized peanut butter flavor that define the dessert.
Chocolate chips
Chocolate chips melt into a rich topping that adds a glossy finish.
Heavy cream
Heavy cream helps create a smooth chocolate ganache that pours easily over the top.
Extra peanut butter for decorating
A few dollops or drizzles of peanut butter on top make the cake look dramatic and echo the filling inside.
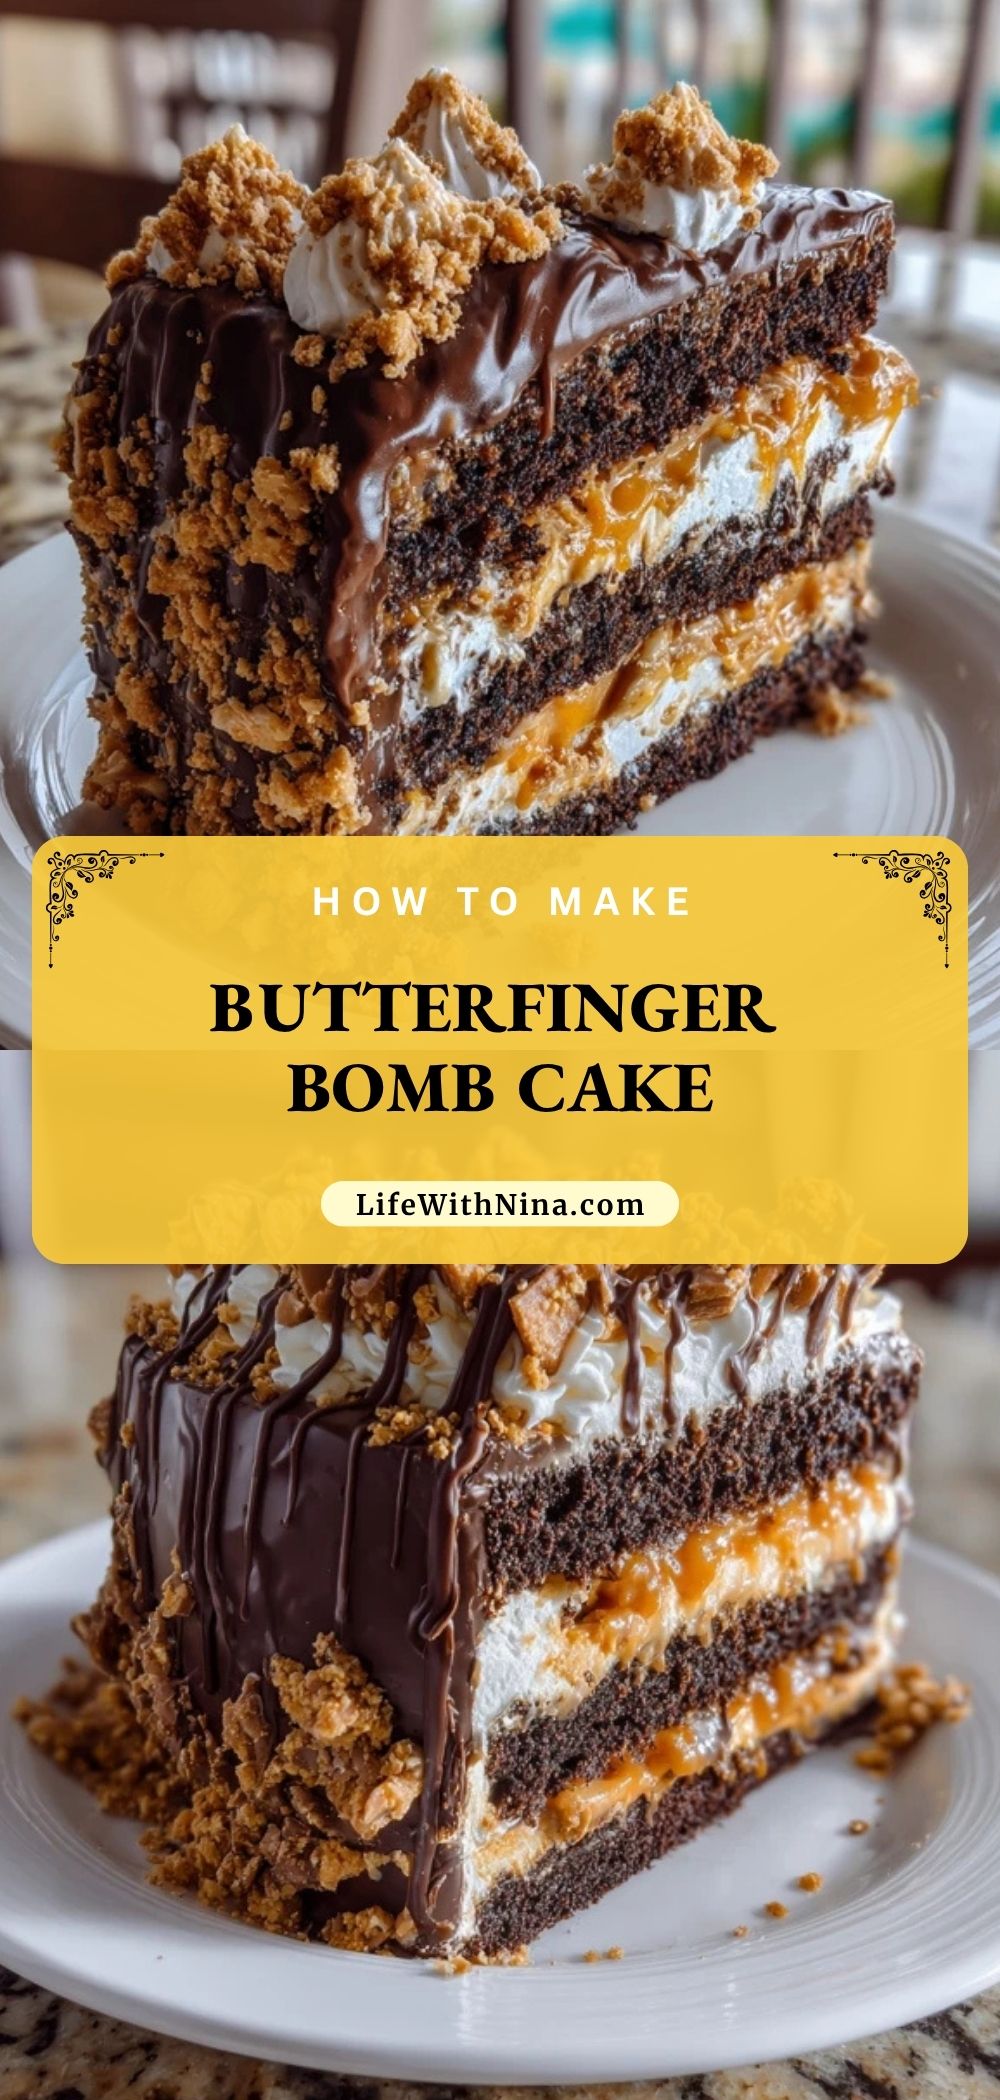
How To Make the Butterfinger Bomb Cake
This Butterfinger Bomb Cake comes together in layers, and each step adds more flavor, texture, and visual appeal. Take your time with the assembly and chill the cake well for the cleanest slices.
Step 1: Bake the Chocolate Cake Layers
Prepare the chocolate cake mix according to the package directions using the eggs, oil, and water. Divide the batter evenly between two greased round cake pans and bake until a toothpick inserted in the center comes out clean. Let the cakes cool completely before assembling.
Step 2: Make the Peanut Butter Cream Filling
Beat the cream cheese until smooth, then mix in the powdered sugar and creamy peanut butter until fully combined. Fold in the whipped topping gently to create a light, fluffy filling that spreads easily.
Step 3: Crush the Butterfinger Candy
Chop or crush the Butterfinger bars into small pieces. You want a mix of fine crumbs and small chunks so the filling and topping both get plenty of crunch.
Step 4: Build the First Layer
Place one cooled cake layer on your serving plate or cake stand. Spread a generous layer of the peanut butter cream filling over the top, then sprinkle with crushed Butterfinger pieces.
Step 5: Add the Second Cake Layer
Set the second cake layer on top carefully. Spread more filling over the top and, if desired, lightly around the sides for a more finished look.
Step 6: Make the Chocolate Topping
Heat the heavy cream until hot but not boiling, then pour it over the chocolate chips. Let it sit briefly, then stir until smooth and glossy. Allow it to cool slightly so it thickens just enough to pour over the cake without running too fast.
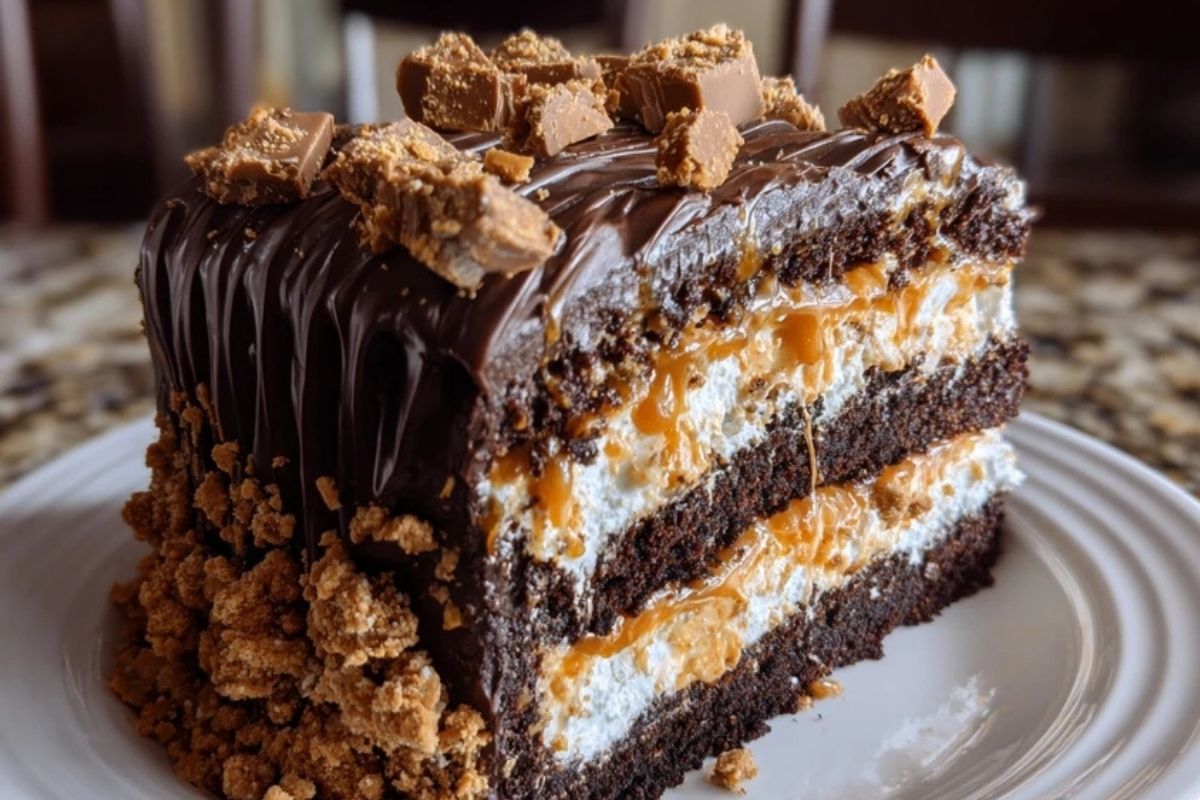
Step 7: Finish and Decorate the Cake
Pour the chocolate topping over the cake, letting some drip down the sides. Add dollops or swirls of peanut butter on top, then finish with more crushed Butterfinger pieces for a bold, candy-loaded look.
Step 8: Chill Before Serving
Refrigerate the cake for at least 1 to 2 hours before slicing. This helps the layers set and makes the cake easier to cut into neat pieces.
Serving and Storing Butterfinger Bomb Cake
Butterfinger Bomb Cake is best served chilled or slightly cool, which helps the creamy filling stay firm and the chocolate topping hold its shape. For an extra special presentation, serve each slice with a little extra crushed candy on top or a drizzle of peanut butter sauce.
Store leftovers covered in the refrigerator for up to 4 days. Because of the cream cheese filling and whipped topping, this cake should stay cold when not being served. For longer storage, you can freeze individual slices in airtight containers for up to 1 month. Let them thaw in the refrigerator before enjoying.
Frequently Asked Questions
Can I use homemade chocolate cake instead of cake mix?
Yes, homemade chocolate cake works beautifully here. Just make sure the layers are fully cooled before you add the filling.
Can I make Butterfinger Bomb Cake ahead of time?
Yes, this cake is actually a great make-ahead dessert. Chilling it for several hours or overnight helps the layers set and improves the texture.
What can I use instead of whipped topping?
You can use stabilized homemade whipped cream if you prefer, but whipped topping is convenient and holds up well in the filling.
Do I have to use Butterfinger bars?
Butterfinger gives the cake its signature flavor, but you could swap in another crunchy candy bar if needed. The final flavor will be different.
How do I keep the ganache from being too runny?
Let the ganache cool for a few minutes after mixing so it thickens slightly before pouring it over the cake.
Can I turn this into a sheet cake?
Yes, you can bake the cake in a 9×13-inch pan and spread the filling and toppings over the top for an easier version.
Want More Dessert Ideas?
If you love rich, fun, and over-the-top sweets like this Butterfinger Bomb Cake, here are a few more dessert favorites from Life with Nina to check out:
- Chocolate caramel dump cake for another chocolate dessert loaded with gooey indulgence.
- Hot fudge pie when you want a classic chocolate treat with a fudgy center.
- Cinna bun cake for a cozy cake packed with warm cinnamon flavor.
- Southern hummingbird cake recipe if you want a fruity, rich layer cake for special occasions.
- Decadent caramel banana pecan cake for another showstopping dessert with bold flavor.
Save This Pin + Share Your Results
📌 Save this Butterfinger Bomb Cake to your Pinterest dessert board so you can come back to it any time.
And let me know in the comments how yours turned out. Did you add extra candy on top? Did you go heavier on the peanut butter drizzle? Did you make it as a layer cake or a sheet cake?
I love hearing how others make these recipes their own. Questions are welcome too, and if you want even more sweet inspiration, browse Life with Nina on Pinterest for more daily recipe ideas.
Butterfinger Bomb Cake
- Prep Time: 25 minutes
- Cook Time: 30 minutes
- Total Time: 55 minutes plus chilling
- Yield: 12 servings 1x
- Category: Dessert
- Method: Baking
- Cuisine: American
Description
Butterfinger Bomb Cake is a rich, crowd-pleasing dessert layered with moist chocolate cake, fluffy peanut butter cream, crushed Butterfinger candy, and silky chocolate ganache. It is an easy recipe for parties, holidays, and dessert lovers who need fun food ideas, chocolate cake inspiration, and indulgent dessert ideas that feel bakery-worthy at home.
Ingredients
1 box chocolate cake mix
3 large eggs
1/2 cup vegetable oil
1 cup water
8 oz cream cheese, softened
1 cup creamy peanut butter
1 1/2 cups powdered sugar
8 oz whipped topping, thawed
6 Butterfinger candy bars, crushed
1 cup semi-sweet chocolate chips
1/2 cup heavy cream
1/4 cup creamy peanut butter for decorating
Instructions
1. Preheat the oven to 350°F and grease two 9-inch round cake pans.
2. In a large bowl, combine the chocolate cake mix, eggs, vegetable oil, and water. Mix until smooth.
3. Divide the batter evenly between the prepared pans and bake for 25 to 30 minutes, or until a toothpick inserted in the center comes out clean.
4. Let the cake layers cool completely in the pans for 10 minutes, then transfer to a wire rack.
5. In a mixing bowl, beat the softened cream cheese until smooth.
6. Add 1 cup peanut butter and powdered sugar, then mix until creamy and fully combined.
7. Fold in the whipped topping until the filling is light and fluffy.
8. Place one cake layer on a serving plate and spread half of the peanut butter filling over the top.
9. Sprinkle half of the crushed Butterfinger candy over the filling.
10. Add the second cake layer and spread the remaining filling on top.
11. Heat the heavy cream until hot but not boiling, then pour it over the chocolate chips. Let sit for 2 minutes and stir until smooth.
12. Pour the chocolate ganache over the top of the cake, letting it drip down the sides.
13. Decorate with the remaining crushed Butterfinger candy and dollops or drizzles of 1/4 cup peanut butter.
14. Chill the cake for at least 1 to 2 hours before slicing and serving.
Notes
Chill the cake before slicing so the layers stay neat and firm.
Use fully softened cream cheese for the smoothest filling.
Let the ganache cool slightly before pouring so it does not run too thin.
Nutrition
- Serving Size: 1 slice
- Calories: 610
- Sugar: 46g
- Sodium: 430mg
- Fat: 34g
- Saturated Fat: 14g
- Unsaturated Fat: 17g
- Trans Fat: 0g
- Carbohydrates: 72g
- Fiber: 3g
- Protein: 9g
- Cholesterol: 75mg
Keywords: Butterfinger Bomb Cake, chocolate cake, peanut butter dessert, easy recipe, dessert ideas, food ideas, party dessert, holiday dessert